
How to do EKS Cluster Load Testing Guide
Creating an Amazon EKS (Elastic Kubernetes Service) cluster with the smallest possible configuration in the us-east-1 region, and deploying an application on it using Nginx and a stress tool to monitor CPU utilization and memory usage, involves several steps. Here’s a simplified guide:

1. Set Up AWS CLI and Configure AWS Account
- Install AWS CLI on your machine.
- Configure it using
aws configureand enter your AWS credentials (Access key ID and Secret access key). 
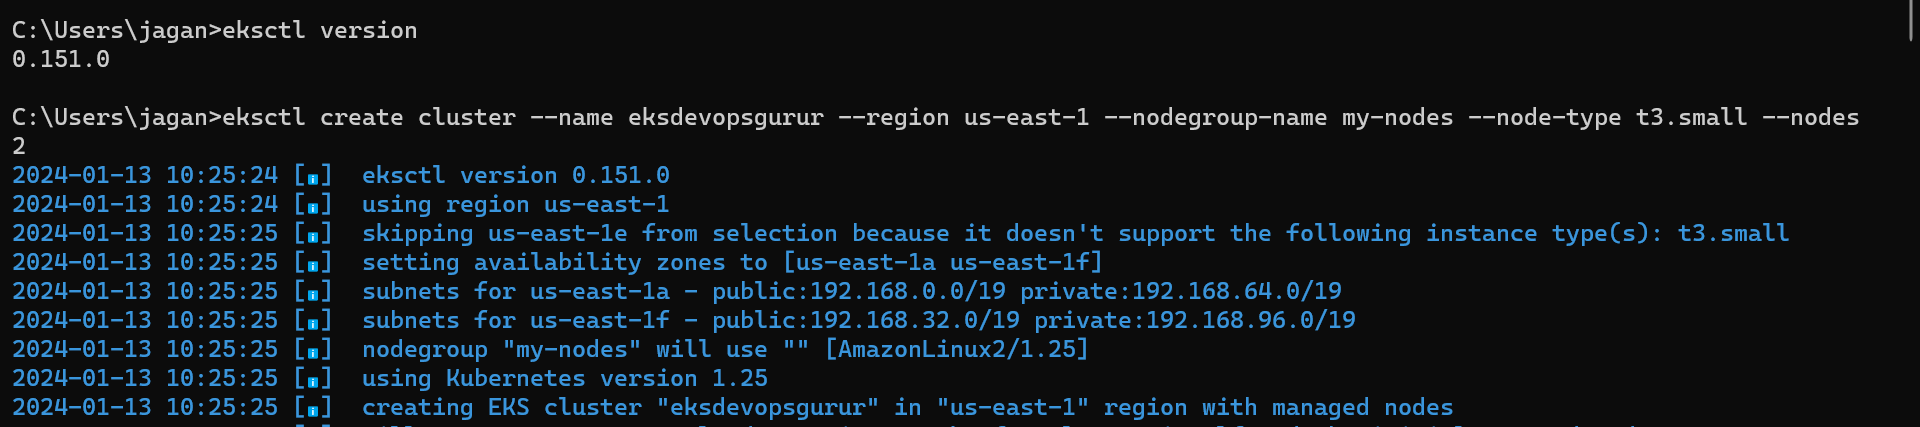
2. Install and Configure eksctl Tool
eksctlis a simple CLI tool for creating clusters on EKS. Install it following the instructions on the EKS documentation.
3. Create the EKS Cluster
- Use
eksctlto create a small EKS cluster. For the smallest configuration, you might choose t3.small or t3.micro instances. Here’s an example command:
eksctl create cluster --name my-cluster --region us-east-1 --nodegroup-name my-nodes --node-type t3.small --nodes 2
- 4. Configure
kubectlfor EKS
- After the cluster is created, configure
kubectlto communicate with your new cluster:
aws eks --region us-east-1 update-kubeconfig --name my-cluster
5. Deploy Nginx Application
- You can use a simple Nginx deployment. Create a file
nginx-deployment.yamlwith the following content:
apiVersion: apps/v1
kind: Deployment
metadata:
  name: nginx-deployment
spec:
  replicas: 2
  selector:
    matchLabels:
      app: nginx
  template:
    metadata:
      labels:
        app: nginx
    spec:
      containers:
      - name: nginx
        image: nginx
        ports:
        - containerPort: 80
Deploy it using kubectl apply -f nginx-deployment.yaml.
This deployment creates pods with the Nginx image and exposes them on port 80.
2. Nginx Service with Load Balancer
Create a service to expose the Nginx deployment. This service will use a load balancer to distribute incoming traffic:
nginx-service.yaml
apiVersion: v1
kind: Service
metadata:
  name: nginx-service
spec:
  type: LoadBalancer
  selector:
    app: nginx
  ports:
  - protocol: TCP
    port: 80
    targetPort: 80
This service creates a LoadBalancer that routes traffic to your Nginx pods.
3. Stress Deployment
Next, create a deployment for the stress tool:
stress-deployment.yaml
apiVersion: apps/v1
kind: Deployment
metadata:
  name: stress-deployment
spec:
  replicas: 1
  selector:
    matchLabels:
      app: stress
  template:
    metadata:
      labels:
        app: stress
    spec:
      containers:
      - name: stress
        image: polinux/stress
        args:
        - "stress"
        - "--vm"
        - "1"
        - "--vm-bytes"
        - "250M"
        - "--vm-hang"
        - "1"
        - "--cpu"
        - "2"
        - "--timeout"
        - "300s"
This deployment runs a container with the polinux/stress image to stress system resources.
This service will create a LoadBalancer, but note that the stress tool doesn’t serve a web application, so the load balancer may not function as it does with Nginx.
Deploying the Manifests
- Apply the Nginx deployment and service:
kubectl apply -f nginx-deployment.yaml
kubectl apply -f nginx-service.yaml
Apply the stress tool deployment and service:
kubectl apply -f stress-deployment.yaml
To increase stress on your Amazon EKS cluster, you can modify the deployment of your stress tool to consume more resources. This can be done by adjusting the parameters of the stress tool to increase CPU and memory usage. Here’s how you can do it:
4. Modify the Stress Tool Deployment
Open your stress-deployment.yaml file and adjust the arguments to increase the load. For example, you can increase CPU and memory stress by modifying the following parameters:
--cpu: Number of CPU workers. Increasing this number will create more CPU stress.--vm: Number of VM workers. Each VM worker will allocate memory specified by--vm-bytes.--vm-bytes: The amount of memory each VM worker should allocate. Increasing this value will create more memory stress.
Here’s an example of a modified deployment that increases stress:
Modified stress-deployment.yaml
apiVersion: apps/v1
kind: Deployment
metadata:
  name: stress-deployment
spec:
  replicas: 1
  selector:
    matchLabels:
      app: stress
  template:
    metadata:
      labels:
        app: stress
    spec:
      containers:
      - name: stress
        image: polinux/stress
        args:
        - "stress"
        - "--vm"
        - "2"  # Increased number of VM workers
        - "--vm-bytes"
        - "500M"  # Increased memory per VM worker
        - "--cpu"
        - "4"  # Increased number of CPU workers
        - "--timeout"
        - "600s"  # Optional: Increase the duration of stress
5. Apply the Modified Deployment
After modifying the deployment, apply the changes:
kubectl apply -f stress-deployment.yaml
6. Monitor the Cluster
It’s crucial to monitor your EKS cluster closely while the stress test is running. You can use tools like AWS CloudWatch or Kubernetes Metrics Server to keep an eye on CPU, memory usage, and overall cluster health
Notes:
- The stress tool is designed for testing and can heavily load your system. Use it carefully.
- The load balancers will have external IPs through which you can access the Nginx service. It may take a few minutes for these IPs to be available.
- Make sure your AWS account is configured to allow the creation of load balancers and the associated costs.