
AWS Bedrock with Custom Model
Prerequisites
- AWS Account: Ensure you have an AWS account.
- Permissions: Ensure your AWS user has the necessary permissions to access AWS Bedrock and related services.
- Data: Have your dataset ready for training your custom model.
Step 1: Access AWS Bedrock
- Login to AWS Console: Go to the AWS Management Console.
- Navigate to Bedrock: In the search bar, type “Bedrock” and select AWS Bedrock from the services dropdown.
Step 2: Create a Custom Model
- Start a New Project: Click on the “Create Model” or “New Project” button.
- Choose a Foundation Model: Select a foundation model that best suits your needs. If Claude is available, select it.
- Name Your Model: Provide a name and description for your custom model.
Step 3: Prepare Your Data
- Upload Dataset: Go to the “Datasets” section and click on “Upload Dataset”.
- Data Format: Ensure your data is in a supported format (e.g., CSV, JSON).
- Schema: Define the schema for your dataset if required.
- Data Preprocessing: If needed, preprocess your data within the AWS Console to ensure it’s ready for training.
Step 4: Train Your Custom Model
- Create Training Job: Go to the “Training” section and create a new training job.
- Select Dataset: Choose the dataset you uploaded.
- Configure Training Parameters: Set the training parameters such as epochs, batch size, learning rate, etc.
- Launch Training: Click on “Start Training” to begin the process.
- Monitoring: Monitor the training job through the console. AWS will provide logs and metrics for you to track the progress.
Step 5: Evaluate the Model
- Model Evaluation: Once training is complete, evaluate your model using a validation dataset or through built-in evaluation tools.
- Metrics: Review metrics such as accuracy, loss, precision, recall, etc.
- Fine-Tuning: If the model performance is not satisfactory, you may need to fine-tune the training parameters and retrain the model.
Step 6: Deploy the Model
- Create Endpoint: Go to the “Deployment” section and create a new endpoint for your model.
- Configuration: Configure the endpoint with the necessary instance type and scaling options.
- Deploy Model: Deploy your custom model to the endpoint.
- Testing: Test the deployed model using sample inputs to ensure it’s working as expected.

Step 7: Integrate and Use the Model
- API Integration: Use the endpoint URL to integrate the model into your applications.
- SDKs: Utilize AWS SDKs for seamless integration.
- Monitoring and Maintenance: Regularly monitor the endpoint for performance and update the model as needed.
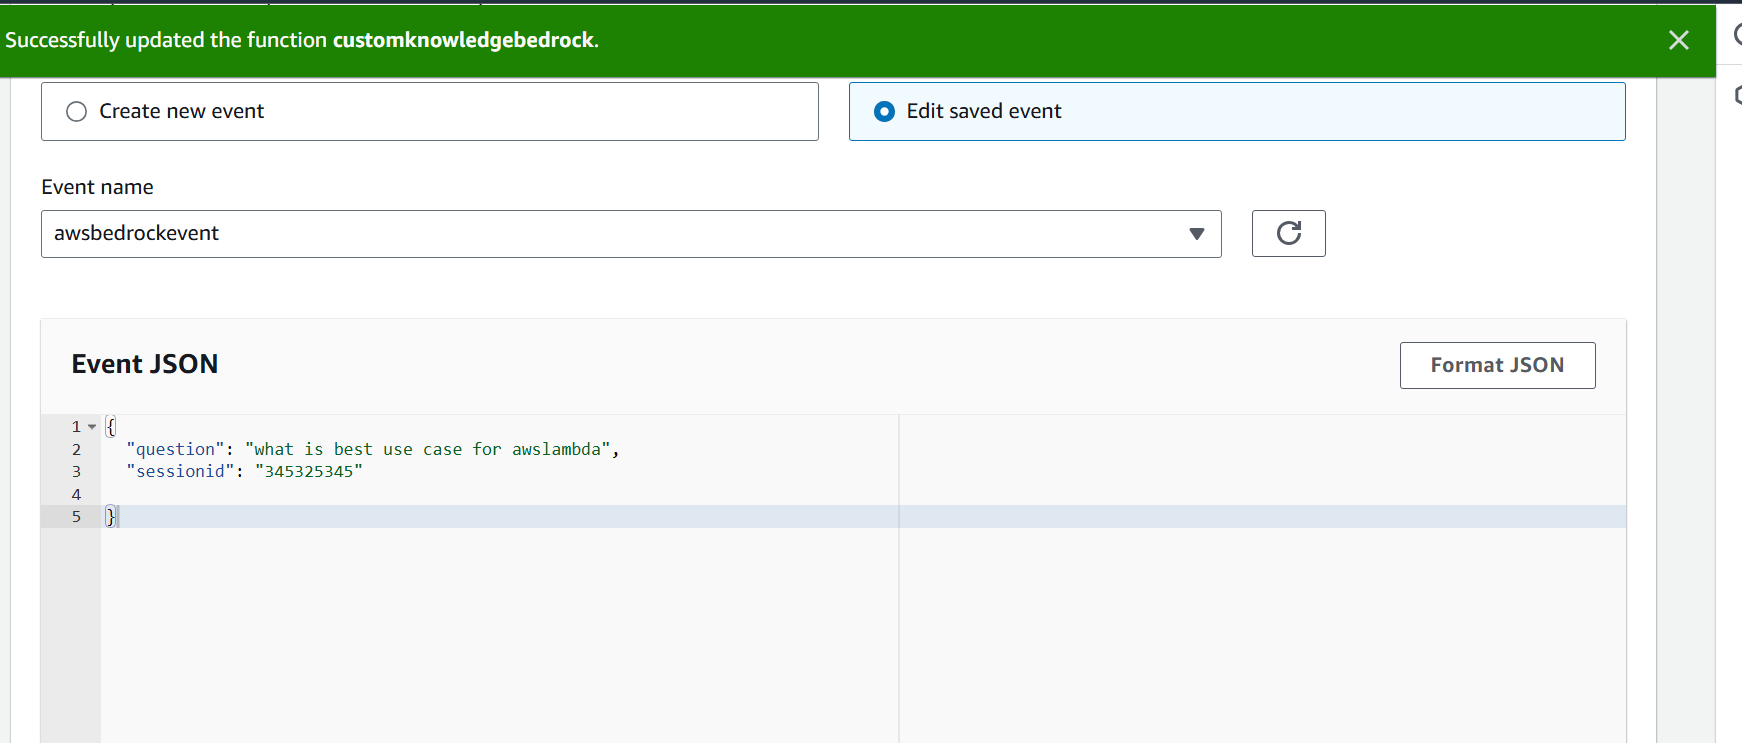
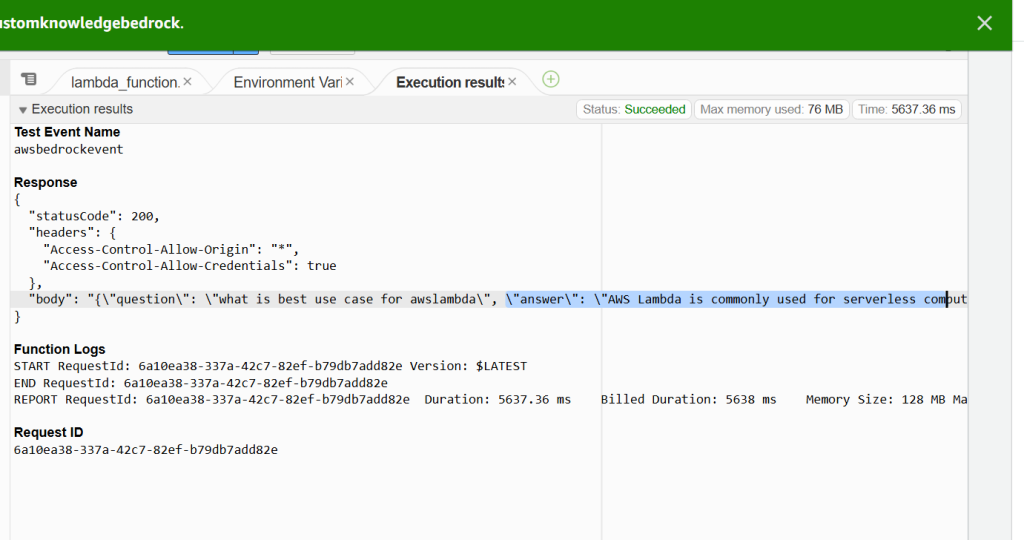
AWSLamdba.py
import boto3
import json
region ="us-east-1"

def lambda_handler(event, context):

    bedrock=boto3.client("bedrock-runtime",region_name='us-east-1')
    model_id="amazon.titan-text-express-v1"

    prompt ="How to design for highly scable the application on ec2 instance with cost effective soultion with two lines"
    native_request= {
        "inputText":prompt,
        "textGenerationConfig": {
            "maxTokenCount": 512,
            "temperature": 0.5,
            "topP": 0.9
        },
    }
    myrequest = json.dumps(native_request)
    response = bedrock.invoke_model(modelId=model_id,body=myrequest)

    model_response = json.loads(response["body"].read())
    response_text = model_response["results"][0]["outputText"]
    return {
            'statusCode': 200,
            'body': f" *** Please Agent Response *** :   {response_text} "
        }
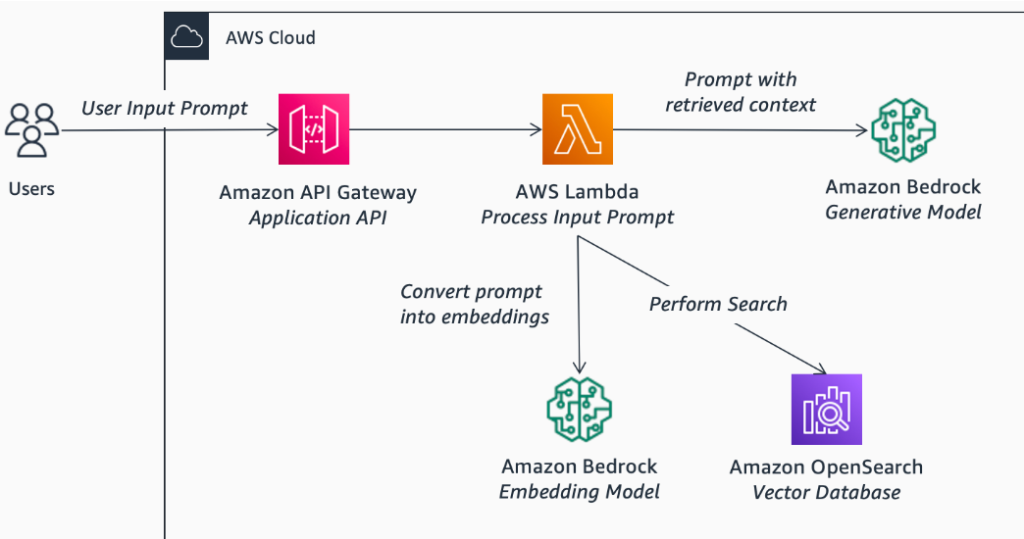
Please go to through :
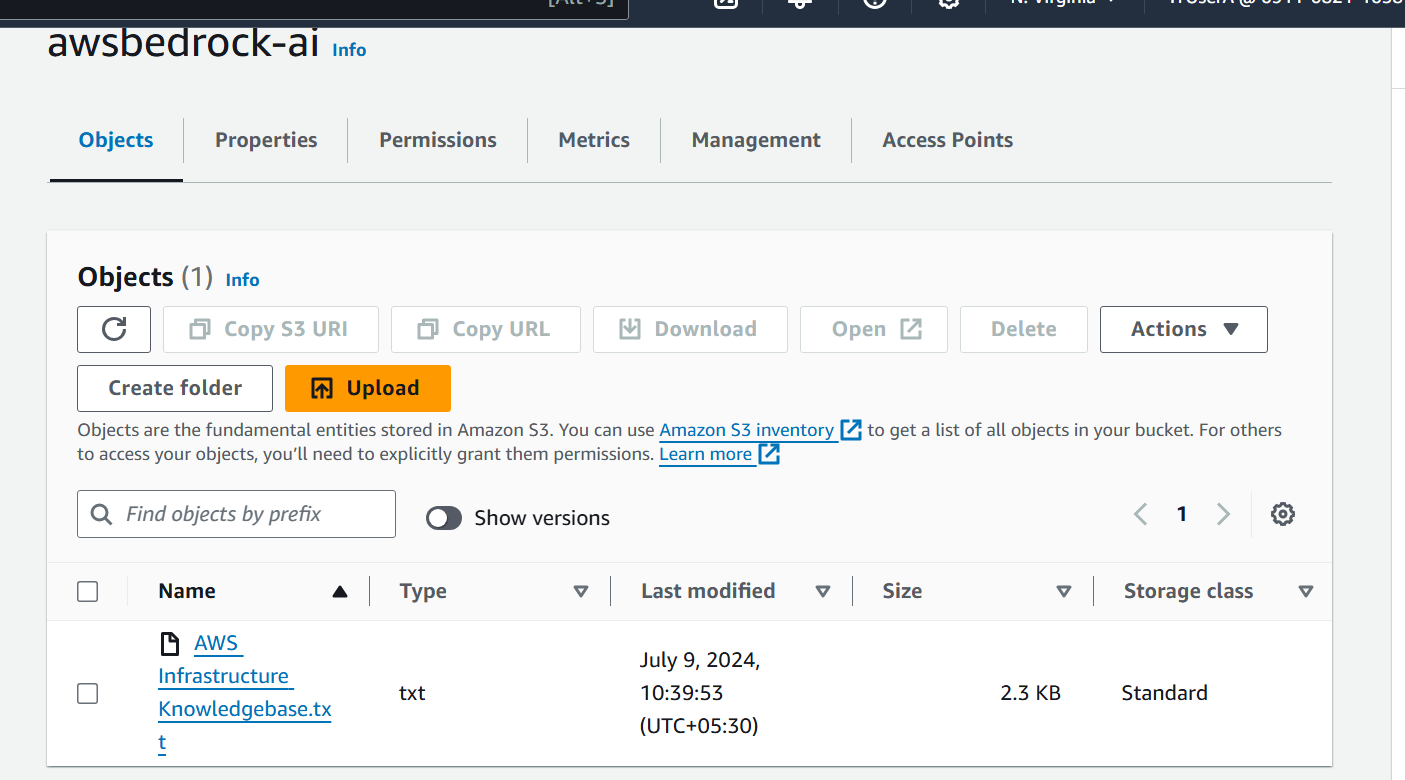
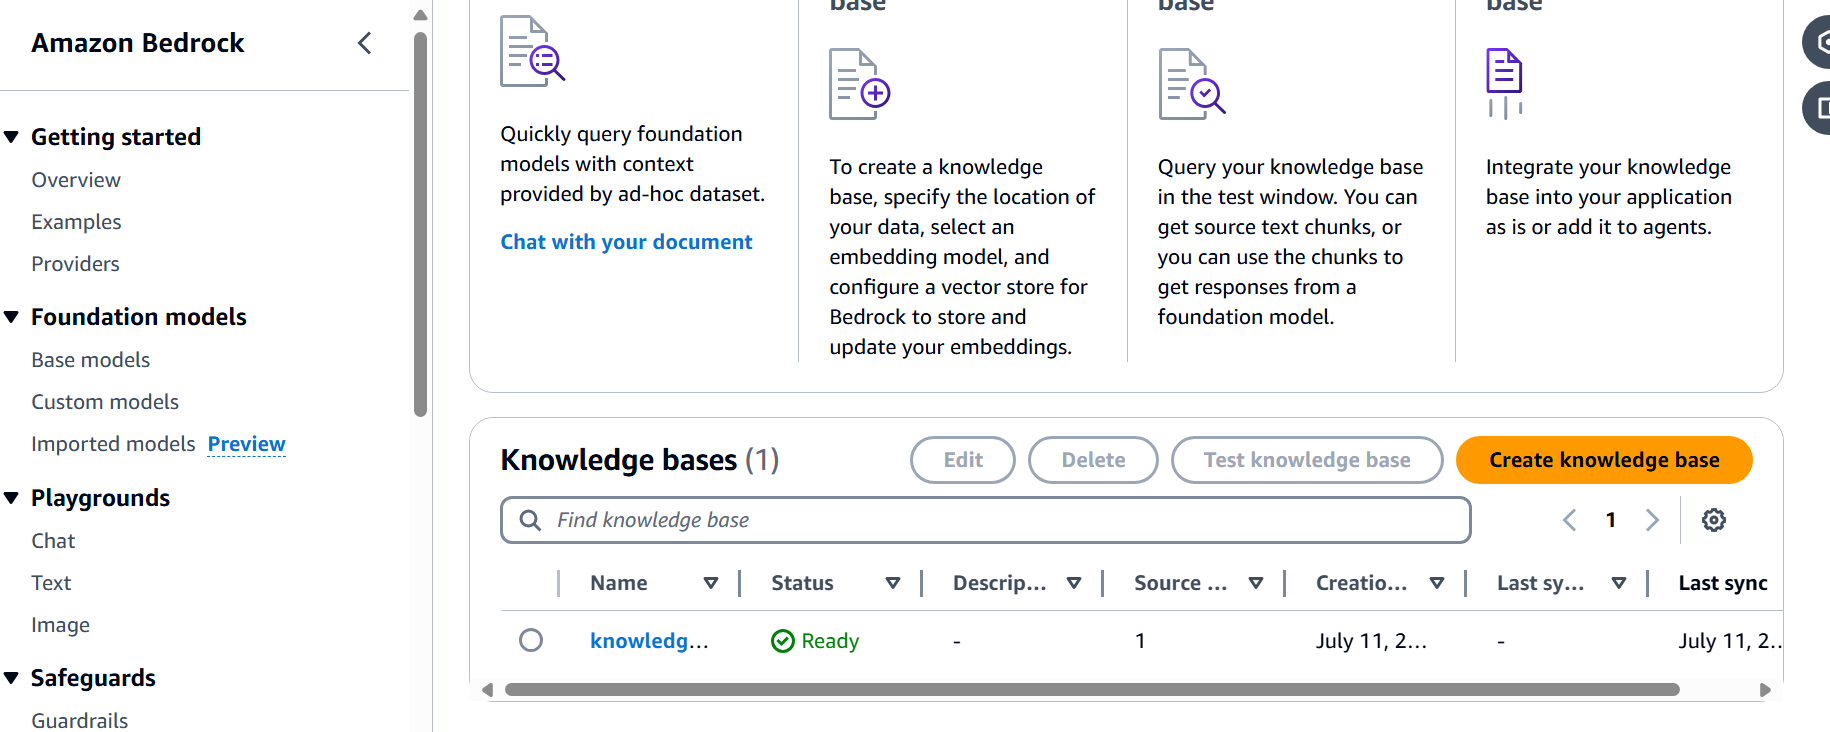
Please go through this link : how to create own knowledge base and chat with AI agent with own custom knowledge base
My reference the article :